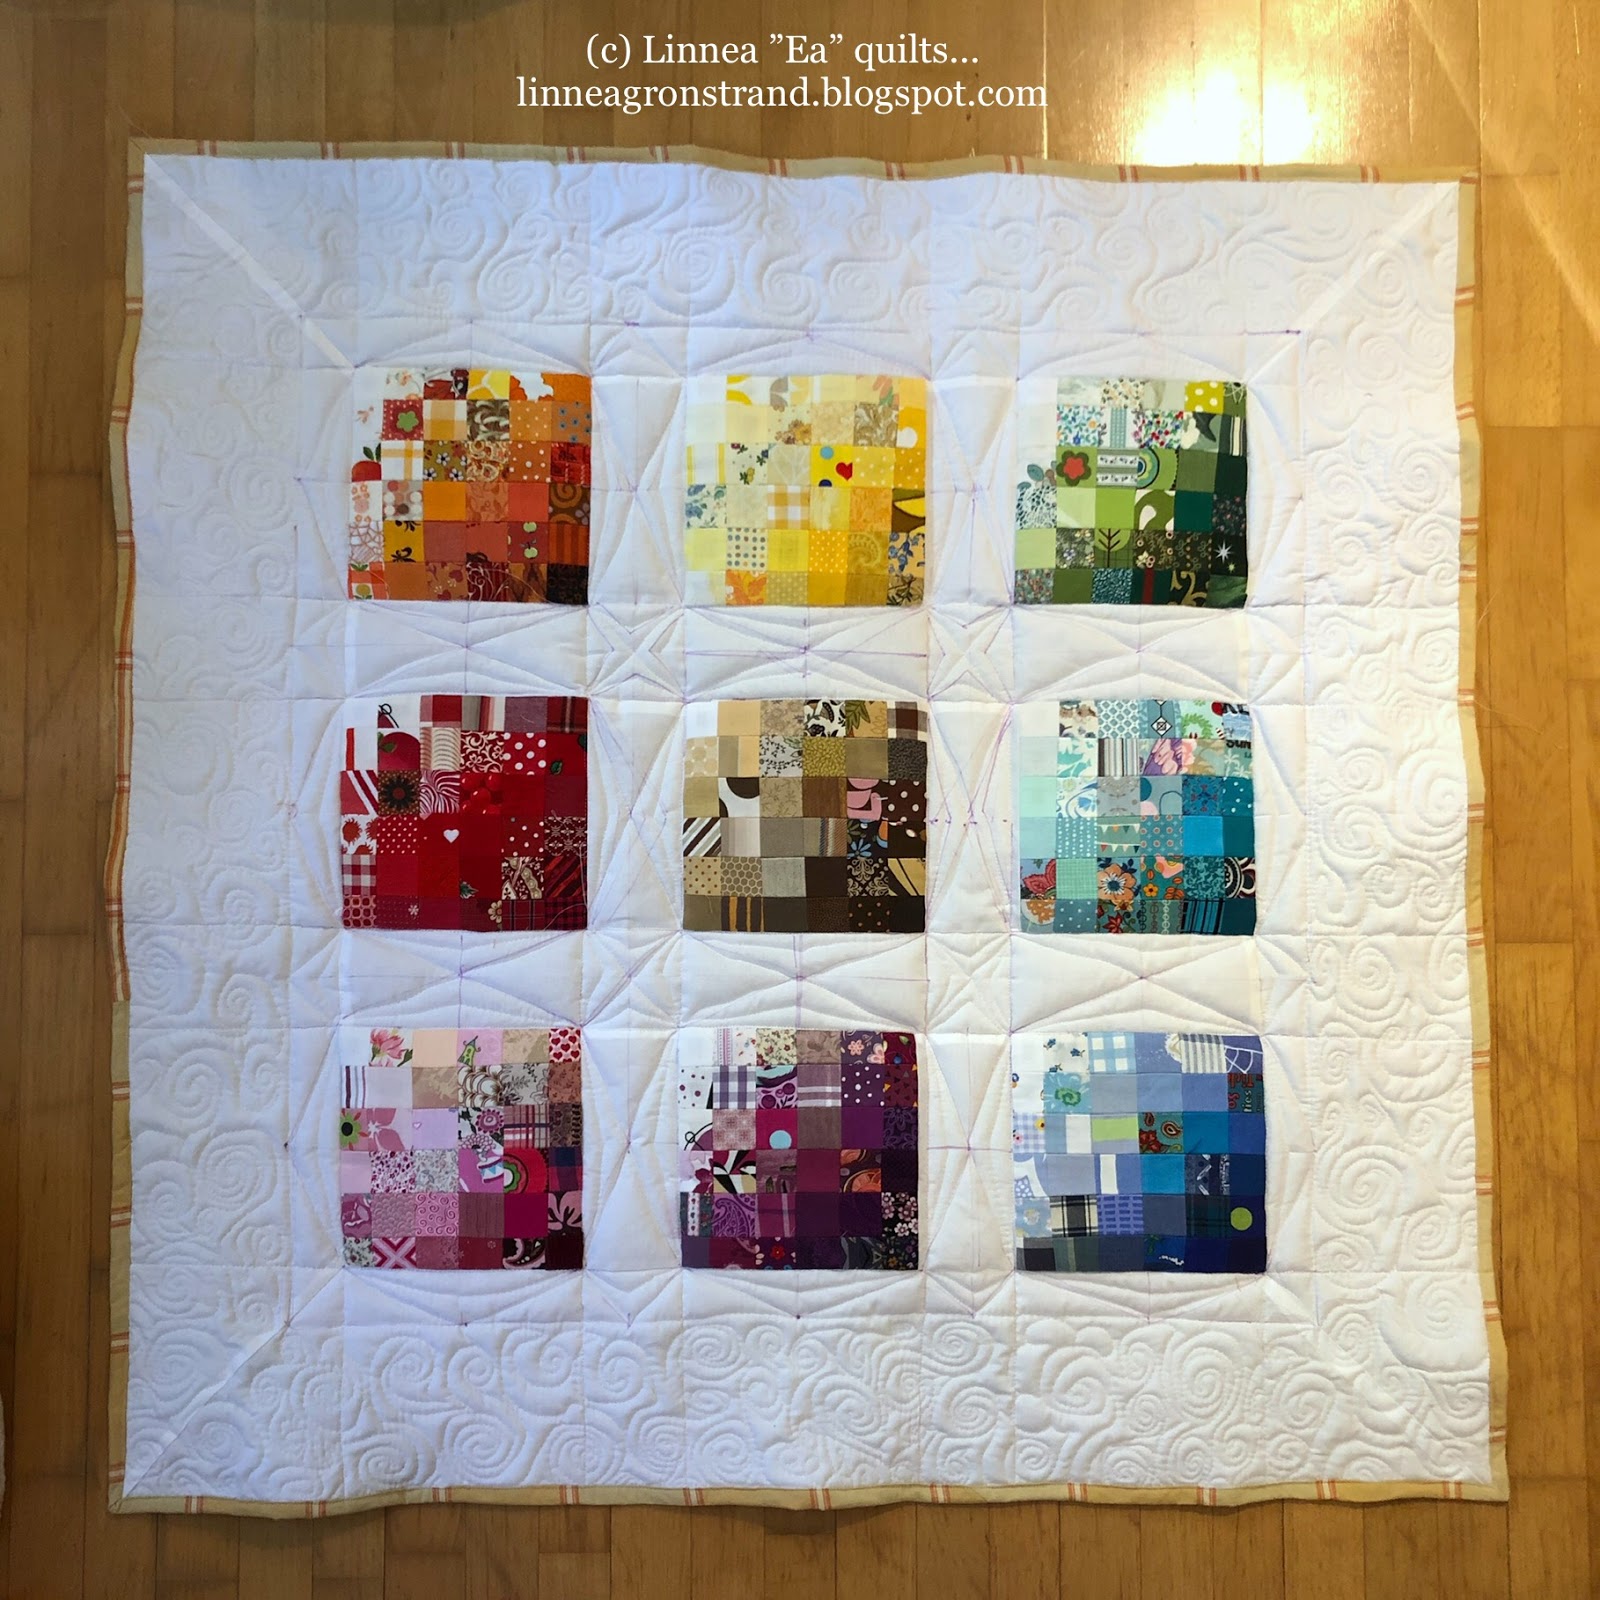
Finished quilt: Julia’s color block quilt

Quilt details
Name, Recipient, Size, Start/Finished date, Pattern and Fabrics used:
- Julia's color blocks quilt (tenth color block quilt out of twelve)
- For Julia Wiklund (Charlotta's and Jimmy's second child)
- 104 x 104 cm (length x height)
- I actually managed REALLY well to square it up, so this quilt is actually this in length and height, and not a middle value of a lot of measurements.
- timeline
- color blocks started in May of 2017
- quilt tops done by the end of November 2017
- this quilt was basted 3.5.2019 (at a weekend course at Arbis)
- quilted and machine bound 9.6.2019.
- no label added, no name embroidered on it. I sadly didn’t have any time for it :(
- gifted on the child's christening day, on 16.6.2019.
- Pattern was my own color block quilt pattern.
- About the fabrics used for the quilt top
- The same as for the rest of the color block quilts, which means that each color block has 36 different fabrics in 5 x 5 cm pieces. 36 x 9 colors (+ 36 black and white that made blocks I ended up not using) means a total of 324 (+36) different fabric pieces.
- White Perla 100% cotton fabric for the sashings and borders.
- You can read more about quilt top construction here.
Batting, backing and binding fabric:
- Batting was one layer of 120 g polyester, from Eurokangas.
- Backing was parts of an IKEA bed linen, a yellow one with red lines, that my mom had donated to me a long time ago.
- Binding was made out of 5 cm strips of the same yellow bed linen cotton fabric, and this is the first time I haven't bound one of the color block quilts in all white!
Quilting pattern:
- Totally out of ideas, I started with just outline quilting the color blocks with straight stitch-in.-the-ditch.
- Then, I started adding dot-to-dot-quilting around the blocks, with free motion quilting. If I had had time, I would have used my walking foot to get it all really exact.
- And then I thought, to sort of contrast the stark geometric pattern that took shape, I needed a more organic design to go around it all, like an outer border. So, I free motion quilted these large and semi-large swirls all around the border, and that was basically it.
Top thread:
- For piecing the top: Gutermann Mara 120, 100% polyester, color 800 (white).
- For free motion quilting: Gutermann Mara 120, 100% polyester, color 800 (white).
Bobbin thread:
- For piecing the top: Gutermann Mara 120, 100% polyester, color 800 (white)
- For free motion quilting: Gutermann Mara 120, 100% polyester, color 800 (white).
- All in all, it took 5 full bobbins and a little on a 6th to free motion quilt the quilt.
~~~~~~~~~~~~~~
I started quilting on this quilt on a Sunday (the 5th of May) while the kids were kept occupied with watching cartoons.

It really didn't work all that well. I had chosen this all over "organic walking foot lines" that would become a sort of base for the whole quilting, and then I had plans to add details on top of that.
And everything about it just felt really off, and not at all like I had imagined it would become.

It started looking so horrible even after just a few quilting lines had been finished, that I just threw in the towel and reached for my (new!) seam ripper.

It all came out beautifully, and then I just placed it back on it's hangers and let it hang out on display for a while.
Almost a month later I -really- looked at it, and just knew that I had got to get it done in time for Julia's christening.
So, on the 9th of June, out came the quilting materials again, and this time around it was easier (I think this was mainly because I kept thinking "I need to get it done NOW" in my head the whole time). Also because I told my husband that "unless you want to go and buy something nice as a present you will have to keep the kids away, because I have to get this one finished today before I leave for the courses I'm taking in Hanko!"
Since I yet had no clue, I just started with outline quilting on it. Different outlines than what I had made previously on other color block quilts, though (check the posts with the label "12 color blocks").

By then, Mikael was outside mowing the lawn and looking after the kids, so I just sat there by our kitchen table and just stared at it.
Hard.
Then I started doodling these dot-to-dot geometric lines, and it sort of evolved from there.

By the time I had managed to get those lines quilted, trying my damndest to do it with the least amount of thread breaking, the kids came inside and wanted me to know they had been with daddy on a walk and now wanted juice and cookies.
Of course, the first thing my son did after that was trying to drive one of his many small plastc cars all over the quilt.

*wroom wrooom*
Lots of driving done on this quilt.

Then, having distracted the kids with some juice and cookies and cartoons, I tried to quickly finish the outer border with the more organic all-over swirly pattern.
You could see it best from the quilt back.


Then, having done that, I just thought ”why not?” and decided to just go ahead and finish the whole quilt.
So, I squared it up. And oh my goodness how SQUARE it became.
I was almost a little shocked.

I mean, just LOOK at that frikkin perfect sewing line meeting the corner!

Tadaah! Binding is on, and this time it's the first of the color block quilts that I have bound with any other color than the same white Perla 100% cotton-fabric as the background.
And it frames the quilt wonderfully!
Here's the quilt back, and it's the leftovers from this that I used for the binding.

I think the only thing - that I think I already knew but didn't remember before I had it up and hanging on the book case for the photos - that is a fault on Julia's quilt, is the fact that this little square on the blue are has a rip.
This was because it was the very last remaining piece of that particular blue fabric, and I think I had made a mental not to put some hand-stitches on it before I would start with the free motion quilting. That small square does consist of two pieces of the same fabric, just with the larger on top of the smaller.
But, alas, I forgot...

But otherwise, this quilt so MUCH without flaws I was stunned by it.
No tucks. No weird drags on any areas. No tension problems.
It was almost a little scary, if it hadn't been for that small rip.
*phew*
Let's move on - the next photo shows the details of the design surrounding the color blocks.

And then a photo of the border looks on top of it.

And that, basically, is the story of how Julia's quilt came to be :)

Have a great day everyone - hope your summer isn't as rainy as mine is right now ;)
~~~~~~~~~~~~~
PLEASE ask permission BEFORE you PUBLICLY copy anything from my blog.
All images, all my text, and content that I specifically haven't referenced as belonging to someone else on this site are my property and they cannot be used, copied or transmitted without my consent.
*
The exception here is Pinterest, because I give you permission to pin my photos there IF YOU CITE THEM AS COMING FROM THIS BLOG AND THUS FROM ME.
*
I understand that Pinterest is useful for saving tutorials and photos for quilting inspiration, because I use it that way myself, and I'm okay with you doing that too - but PLEASE: "cite when you write".
Give the creator some credit, will you?
*
I have nothing against you trying to make something similar, or even selling it, but I'd like to get some credit for being your inspiration.
Why? Well, because lots of crafts are passed down from person to person,
and it feels nice to be able to say "yes, I taught you how to make that".
*
What I DON'T LIKE is you flat out stealing my photos and my written text.
*
If you want, check out my own shared Pinterest board: My creations
Or my Flickr photos: My photostream
*
For questions or further permissions, please email me at linnea.gronstrand [at]gmail[dot]com


Comments
Post a Comment