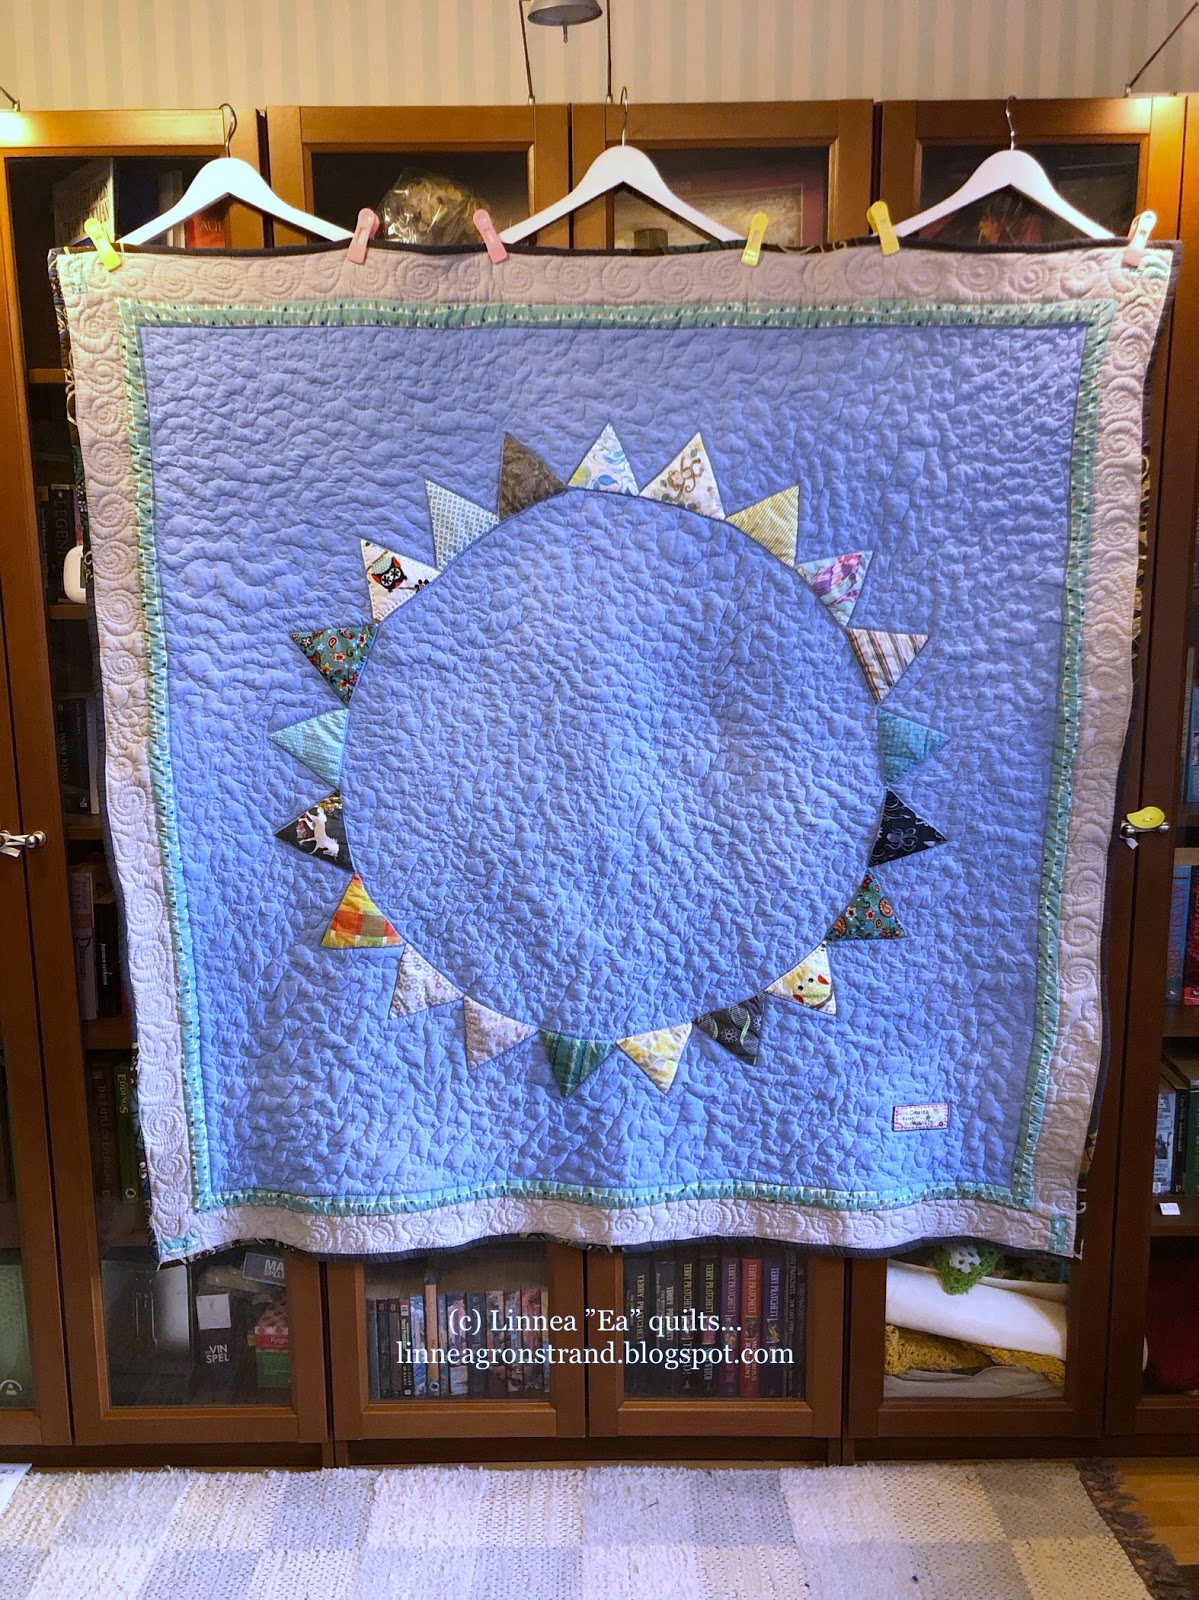
Finished quilt: You, Me and the Sun
Quilt details
Name of quilt and Recipient:
- "You, Me and the Sun",
- for Janika Sund
Size and Timeline
- 154 x 153 cm (length x height).
- timeline
- quilt top started on June 28th and was done on June 29th.
- quilt was basted on June 30th.
- machine-quilted with free motion quilting June 30th and July 1st.
- bound by machine on July 1st
- label appliqued on the quilt top already June 28th and embroidered details were added at the same time.
Pattern and Fabrics used:
- No pattern, just an idea of a giant sun or compass that I thought up.
- About the fabrics used for the quilt top
- Background is a blue solid that was the biggest piece of blue solid I could find in my stash. I think it was fabric meant to be used to make bed linens.
- Every single piece of fabric to make the quilt top came from my stash, and I had my little 3 y o son help me choose the fabrics. "Blue!" was the main color he wanted, so (no too childish) blue, gray and green fabrics were what I used.
Batting, backing and binding fabric:
- Batting used was a regular 150 g polyester from Eurokangas.
- Backing used was pieced together from a flower patterned fabric I had gotten from the stash at Arbis, and two coordinating solids from the top. It was all the flea market light blue solid fabrics (see here, and here) I had left in my stash, and all of that flower fabric got used up too!
- Binding used was 5 cm wide, and made from two different grey fabrics I had that coordinated with the top. Only one of them left a few small scraps, so they were pretty much used up too.
Quilting pattern:
- The center and all of the surrounding blue background is loop-de-loops. And boy it was hard to do that: I quilt-wrestled to get it through the machine, and on top of it all the machine kept breaking thread ALL THE TIME! And no amount of trying to fix it helped, either.
Piecing and quilting thread:
- For piecing both the top and the backing: Gutermann Mara 120, 100% polyester, 1000m, color 1 (natural white).
- For the applique, I used the same as above.
- I embroidered the label, and two of the small "flags", with warm brown Perlé cotton.
~~~~~~Quilt top construction~~~~~~
My son is going to be changing daycare group (from the 0-3 year olds to the 3-5 year olds) in August, and with that he is going to be assigned a new ”contact person” or "primary care person" in his new group.
This quilt, with fabrics he got to choose himself (and then me trying to add others to make them all match and work with the background) and his name on the quilt label, is his and my big ”thank you!” to that person.
Her name is Janika, and she’s been his daycare normal and steady rock from the first day he started going to daycare. This was while I was just starting to work on getting rid of my depression, which made it even more important for him to like being in his new group.
Of course everyone else at his little group at daycare helped, but Janika worked with him a LOT on speech and concentration training. Also on getting him to stop biting and hitting people (because he couldn't articulate what he wanted to say and so took it out on others :( )
I’m going to be forever in her debt for that, so she -really- deserves to get a quilt to remember him by.
~~~~~~Quilt top construction~~~~~~
Since this was more a play with fabrics than anything else, designing how I wanted the quilt to look was actually really easy.
I drew, on the blue background fabric, with vanishing Prym marker a big circle, and around this circle's perimeter I placed as many unilateral triangles as I could.

What I instead tried to do, and then realized that I needed too many pins and still didn’t get as sharp corners as I would have liked, was just trying to help it along by stabilizing the area using an embroidery hoop. Yeah, templates would have been so much easier.

I added the two borders, and even if I happened to have JUST enough of the teal-with-small-flags fabric the same could not be said about the light gray.
It was the ONLY light gray fabric I had that perfectly matched the center blue, so I had to do some really creative piecing at all the corners to get them to line up. I used the small pieces that were left from making the skinny light turquoise border, as well as all the gray cut-offs I could find.. Together, they were just enough.
I think the top came together quite well.
I think the top came together quite well.

~~~~~~Free motion quilting~~~~~~~
Since the compass/sun in the middle of the design kinda lent itself to thoughts about waves, I wanted a design that would be simple yet kinda look like waves. Loop-de-loops were the easiest then, in my opinion, so I thought I would quilt loop-de-loops on all the blue background fabric, and do something else on the the borders and appliqué.


I made these big swirls on the outer gray border, and those the machine managed to make really well - no thread issues at all! You can see the swirls in this photo, even if I'm already sewing on the the binding.

Here's a photo with better details.

Johanna G had donated some fabrics a few weeks back and this fabric with printed labels came in handy here. I embroidered just the names of my son and Janika on it, and I did it so that the thread comes through all the layers but the backing, thus anchoring it to the top pretty well.

While I was sewing in the thread ends, sitting on my bed while listening to some quilting podcasts, my son came to "inspect" his gift to Janika. He thought it made a splendid tent to hide under!

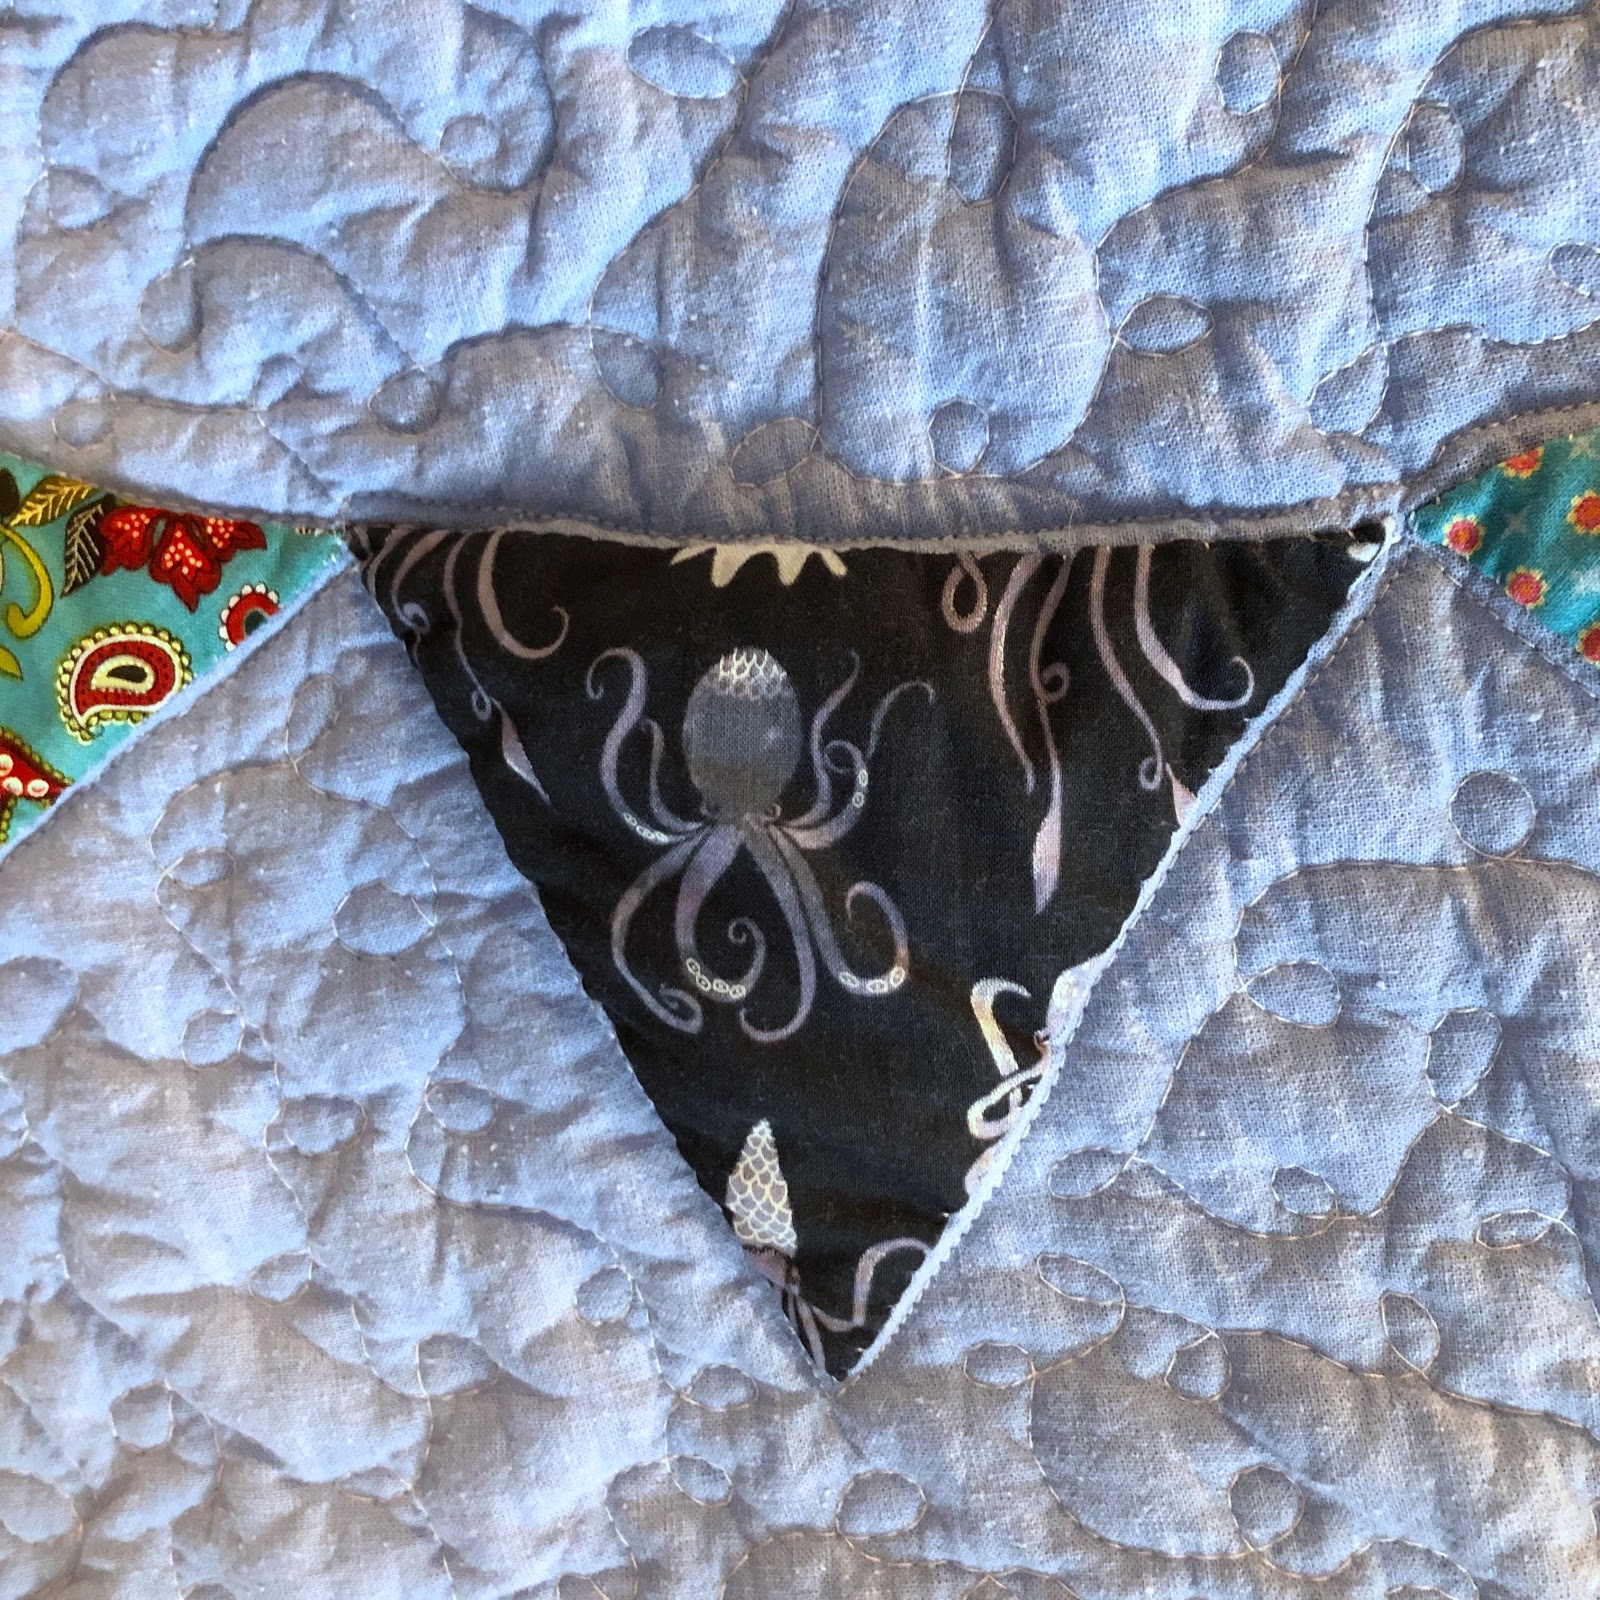
And here's a few more photos of the "flags" (the appliqué making up the compass/sun ring). The first two photos of the owls are supposed to symbolize Gabriel and Janika - him being the smaller one and her the larger one. They were also the only ones I put some handquilting details on, together with the label.
Most of the fabrics were from the ones I got from Johanna.


The back I pieced was a really creative one, because I really had to use all the tricks in the sewing book to get it large enough. The darker blue is the last of the fabric that was left from piecing the front. So all of that fabric was totally used up.
And the light blue and the neutral with the small light blue flowers on, they were all the fabrics that were left over from those too. Or at least I think so, because there wasn't enough scraps left over from the flower fabric when squared it up, maybe enough for two-three EPP hexies because I remember placing it among the scraps to use for my Summer Kingfisher quilt.
So that's basically another two stash fabrics totally used up.

Because of a miss when I had to re-position the backing fabric, when I noticed that it had started forming this "bubble" while I was quilting the center, I instead got this tuck in the compass ring.

After that, I guess the amount of tucks and other problem areas just started accumulating, because these all followed in the wake of that large tuck.


First, it caused problems with the tension while I was free motion quilting, and then it caused all the bubbles and tucks on the back because of it. No amount of using extra fabric pray glue helped, it was just too thick for this big project.
I just have to remember that for the next time :)

And that was how Janika's quilt was made.
Have a great day, and thank you so much for reading :)
~~~~~~~~~~~~~
~~~~~~~~~~~~~
PLEASE ask permission BEFORE you PUBLICLY copy anything from my blog.
All images, all my text, and content that I specifically haven't referenced as belonging to someone else on this site are my property and they cannot be used, copied or transmitted without my consent.
The exception here is Pinterest, because I give you permission to pin my photos there IF YOU CITE THEM AS COMING FROM THIS BLOG AND THUS FROM ME.
I understand that Pinterest is useful for saving tutorials and photos for quilting inspiration, because I use it that way myself, and I'm okay with you doing that too - but PLEASE: "cite when you write". Give the creator some credit, will you?
I have nothing against you trying to make something similar, or even selling it, but I'd like to get some credit for being your inspiration. Why? Well, because lots of crafts are passed down from person to person, and it feels nice to be able to say "yes, I taught you how to make that".
What I DON*T LIKE is you flat out stealing my photos and my written text.
If you want, check out my own shared Pinterest board: My creations
Or my Flickr photos: My photostream
For questions or further permissions, please email me at linnea.gronstrand [at]gmail[dot]com


Comments
Post a Comment