Finished quilt: the I-spy baby quilt

Quilt details
Name, Recipient, Size, Start/Finished date, Pattern and Fabrics used
- The I-spy baby quilt
- I made it for practice on how to make a certain block.
- 79 x 80 cm (length x height).
- 26.3 - 7.5.2018.
- Improvised baby quilt made using practice economy blocks.
- About the fabrics used:
- The blue background fabric I used for the backing was a second hand store find. I found it the same Saturday the Jeans workshop ended, and it's the same one I used to make the background in the Fake cathedral window quilt. I bound the quilt with the same fabric.
- The white background fabric on the front is actually three different white fabrics; the one in the economy blocks is 100% cotton white (A100) Perla fabric scraps from Eurokangas (scraps in that they were leftovers from the color blocks quilts), the white blocks around the economy blocks is a slightly more cream white fabric that I think is a old linen and is a flea market find, and the last one (that makes up the outer border) is a cold white fabric with a different and tighter weave than the others. Also a flea market find, and I think it's meant to be clothing fabric. Those flea market fabrics are ones that I bought in Espoo in March.
- The light blue/turquoise polka dot fabric is from Panduro, and when I tried to find the link for it, I can't find it. Must mean that it's out of print.
- The black in the inner (skinny) border and in the economy blocks is the same, and it's from one of two black FQs (fat quarters) I bought in Umeå at Syfestivalen last year.
- The owl fabric is from scraps I saved from when I made my little daughter's first baby quilt.
Batting, backing and binding fabric:
- Single layer of thin (60 g) polyester batting from Kruunun Kangas.
- Binding was made out of 5 cm wide fabric strips of various lengths, of the same blue as the backing fabric.
Quilting pattern:
- I wanted to learn how to create "economy blocks" (aka diamond or square-in-a-square blocks). These also were a thing I just wanted to sew because I couldn't make progress on other project. The idea with them were to learn how to make this type of block. It has many names; economy block, square-in-a-square block, diamond block. But what it does is provide you with a nice way to show off fussy cut fabrics.
- The first block pieced is the one that ended up on the back, because it got wonky. The rest of them, five in total, I sew into a square layout on what eventually became the top. Yeah, it was pretty much a ”Yes, and...” make-do-type of quilt from start to finish.
- I got 6 blocks sewn from the fabrics I had, and then I ran out of both the black and the polka-dot-blue fabric. And then I was stuck for a while, because I had no idea what I wanted to make them into.
- One thing I did learn: when in doubt, start with putting background around the blocks.
Top thread:
- For piecing the top: Gutermann Mara 120, 100% polyester, 1000m, color 800 (white).
- For piecing the back: Coats, 100% polyester, 200m, color 9068 (dark blue).
- For free motion quilting
- Coats, 100% polyester, 200m, color 9068 (dark blue) for the outer border pattern.No quilting done on the black skinny inner border.
- Gutermann Mara 120, 100% polyester, 1000m, color 800 (white) for the center medallion.
Bobbin thread:
- For piecing the top: Gutermann Mara 120, 100% polyester, 1000m, color 800 (white)
- For piecing the back: Coats, 100% polyester, 200m, color 9068 (dark blue).
- For free motion quilting: Gutermann Mara 120, 100% polyester, 1000m, color 800 (white).
- All in all, it took about 2 full bobbins to free motion quilt the quilt.
~~~~~~~~~~~~~~
So, I read a lot on quilt block designs. And I pin a lot of block ideas on my Pinterest boards, basically just to keep track of ideas for quilts and block patterns I’d like to try out one day.
The square-in-a-square / economy block / diamond block is one of these ”want to try and make it”-blocks.
I’m gonna post some progress photos here, along with some comments, about how I went about making this I spy-quilt. It was pure make-do from start to finish, and I’m happy it came together so well in the end.
Those small owl pieces had been pinned to my design board for a long time. Just goes to show how long it sometimes takes for me to try something out...
 |
| Since I used cm instead of inches, and all tutorials I found online only lists how-to's with calculated pieces in inches, I had to draw the block and then measure the pieces. Yeah, that's one more way to do it... |
 |
| Then, I made one test block. After, I cut out the pieces for the others. |
 |
| First pieces added. |
 |
| Second pieces added. |
 |
| Third pieces. |
 |
| Tadaa! Whole block done. And that was the last of the black and nearly all of the blue polka dot fabric. |
 |
| The block on top was the one that was the most wonky. Because that's what happens when you try your damnedest to cut out pieces from a, already fussy cut-up fabric. I'm putting tat block on the back of the quilt. |
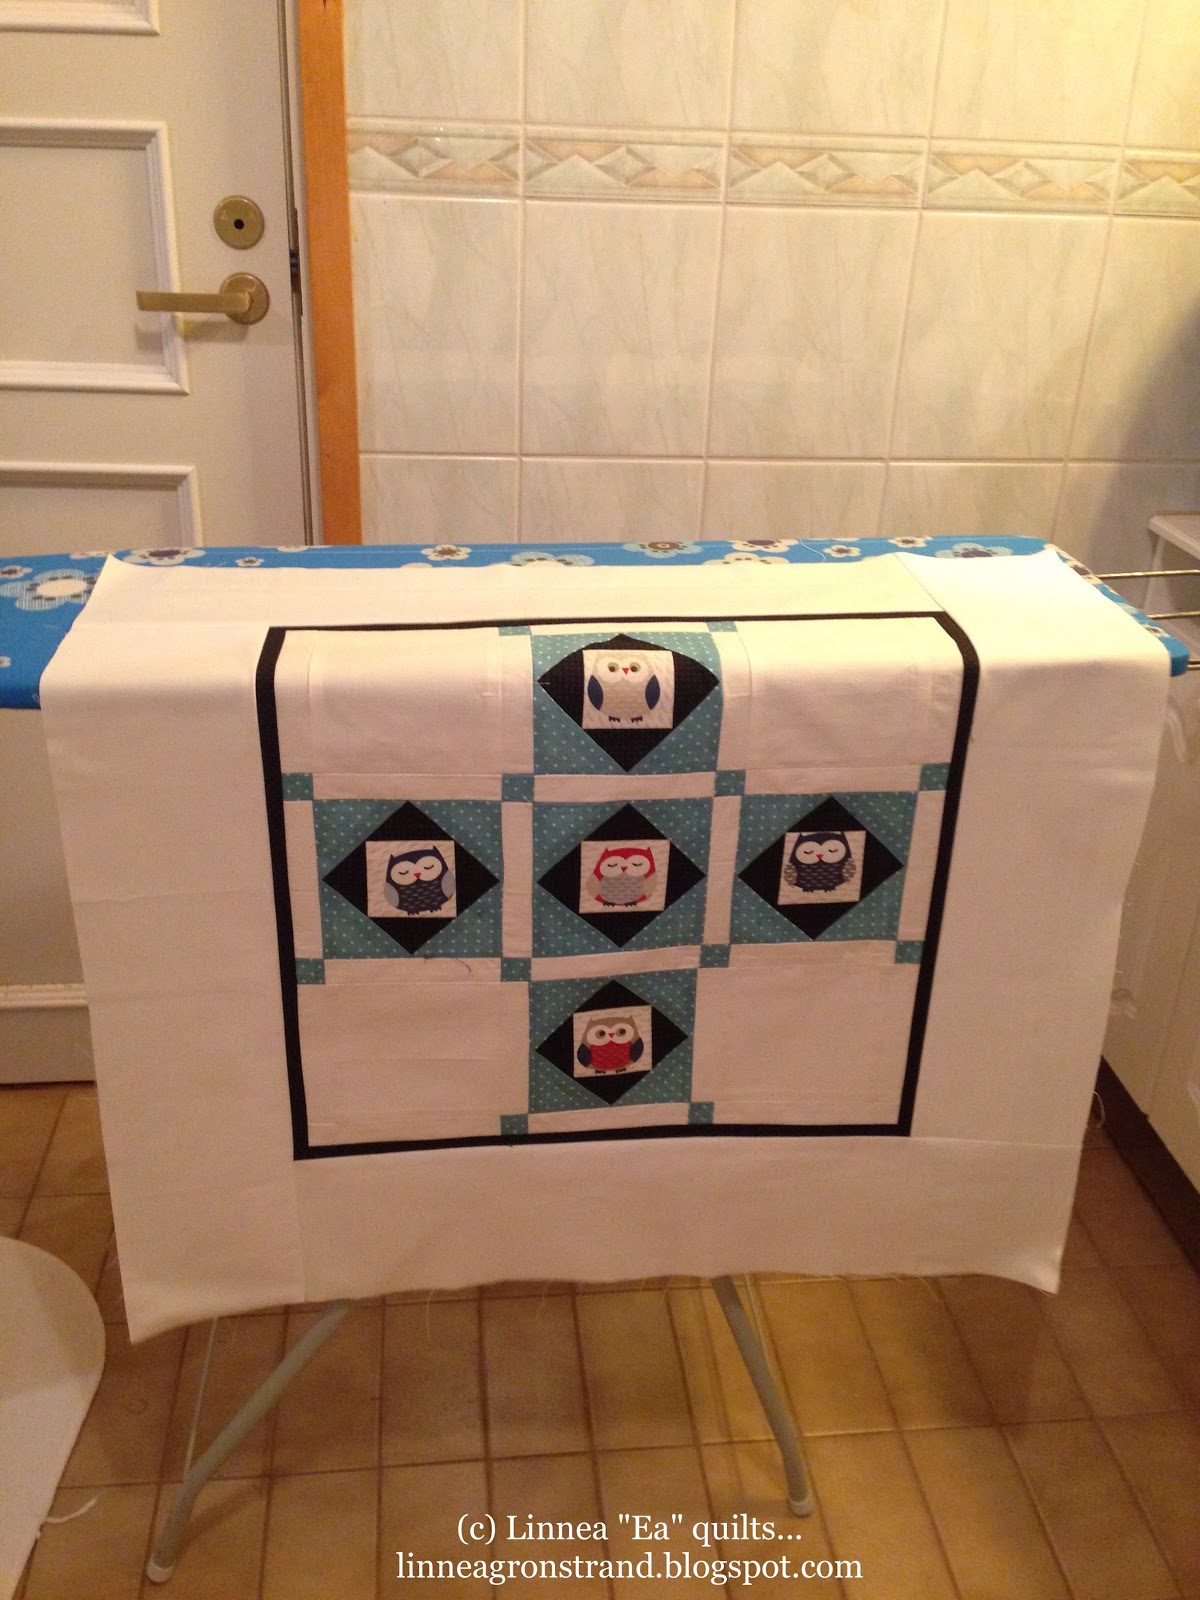 |
| Tadaa! Quilt top, done. And ironed. And squared up. |
 |
| Off to become spray basted. |
 |
| Then, stay-stitched around the edges, |
 |
| The back was pieced together with the same dark blue fabric as I had used on the front. But... |
 |
| Oh no! After free motion quilting the front, I noticed that the block didn't align with the ones on the front. That won't do! It would drive me bonkers, and surely also the one it will be gifted to in the future won't like it. |
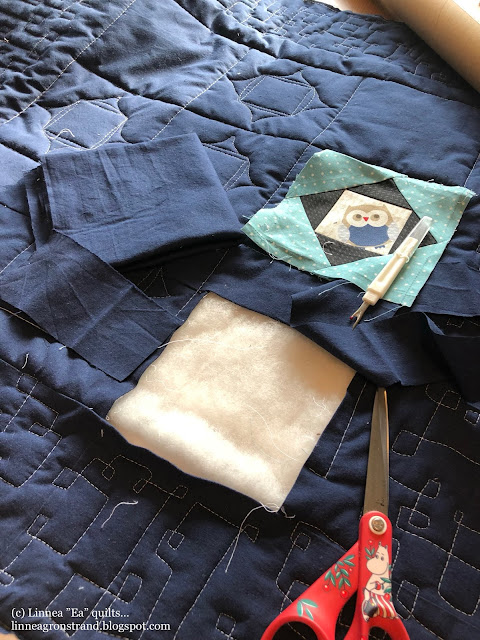 |
| What else was there to do, but take the seam-ripper and remove it. |
 |
| I cut our a piece of the dark blue to fill in the missing area, and put in the block again. |
 |
| Fitted... |
 |
| Pinned... |
 |
| And finally, hand-sewn in place. |
 |
| Putting the binding on. Same dark blue as on the back. |
 |
After I had the free motion quilting fixed,
it looked like it really belonged there.
|
 |
| Hm...the quilting might not be the most even, but it's done. And I think it looks okay. Because the front matches the back. |
 |
| Even if you can see that the block has been moved, you only see it if you really look closely. |
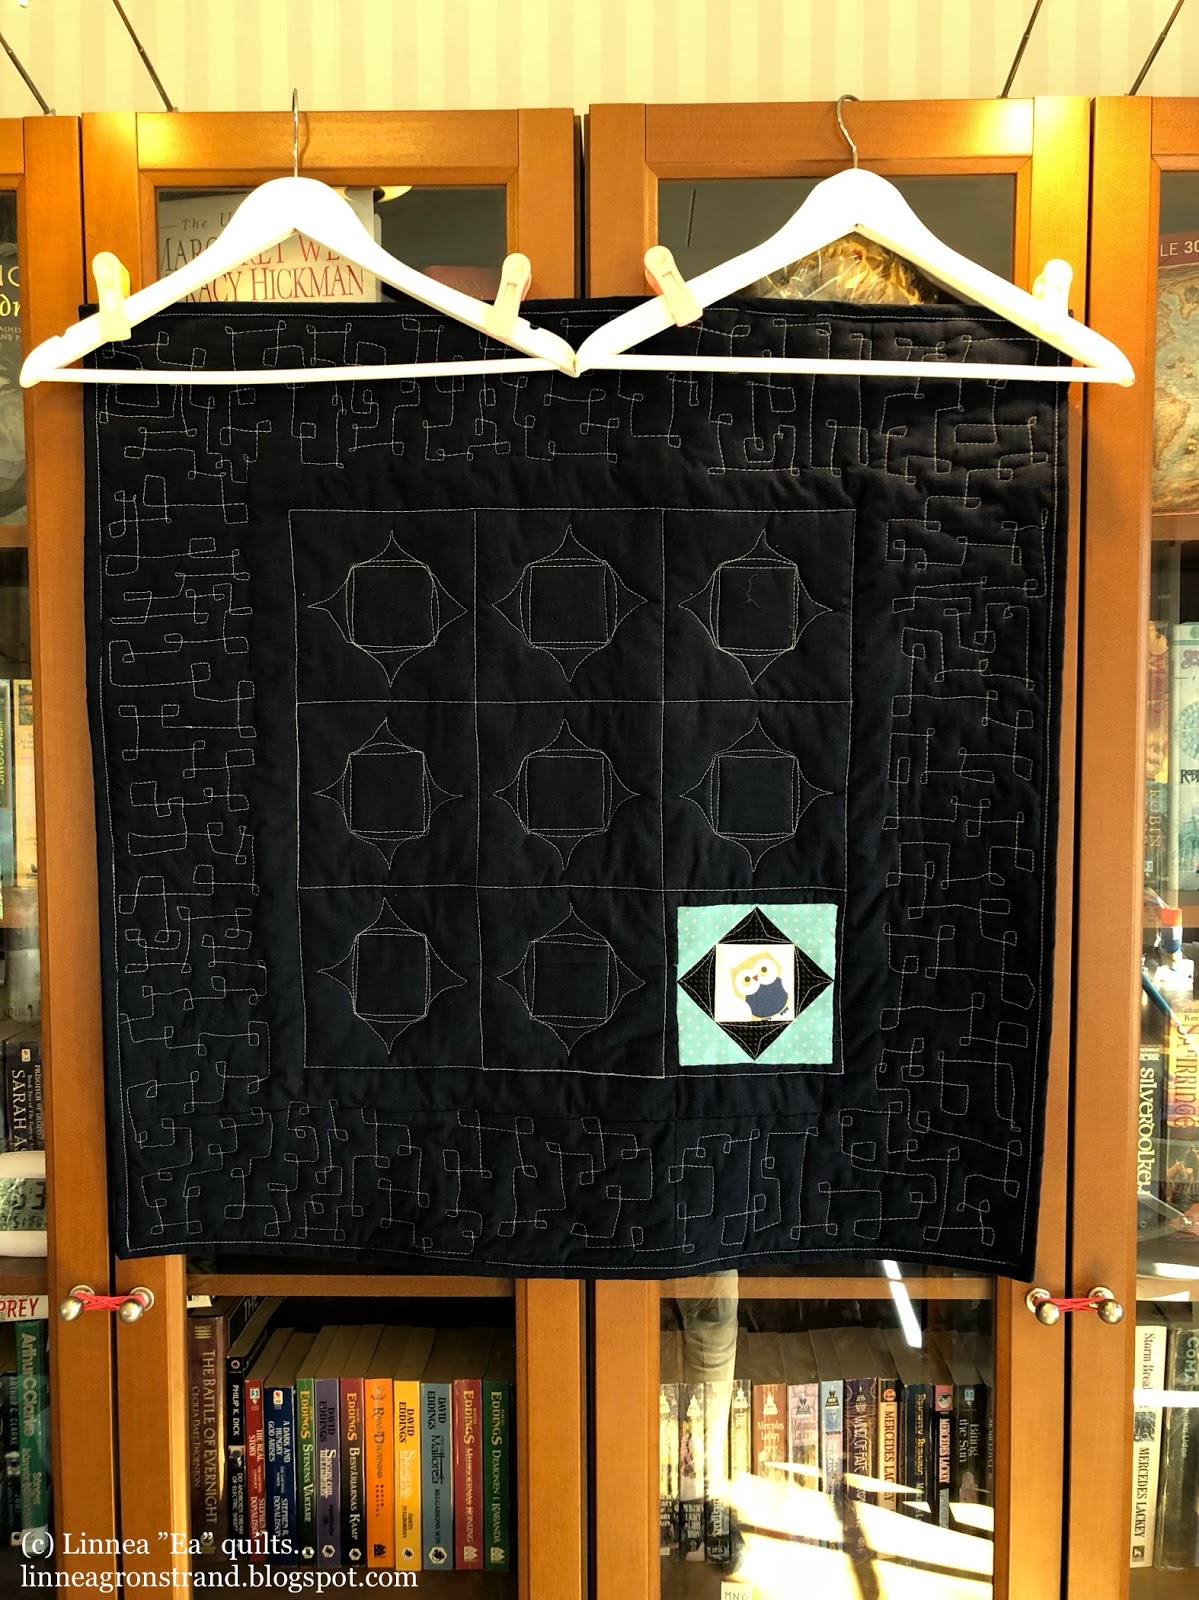 |
| About the quilting; I did a loop-de-loop variant with squares and straight lines (instead of the usual curvy ones) on the border. I did some outline quilting in and around the economy blocks. |
 |
| And that's how it was quilted. |
~~~~~~~~~
And that’s how this quilt came to be :)
Wishing you a happy quilting day, wherever you are right now!
~~~~~~~~~~~~~
PLEASE ask permission BEFORE you PUBLICLY copy anything from my blog.
All images, all my text, and content that I specifically haven't referenced as belonging to someone else on this site are my property and they cannot be used, copied or transmitted without my consent.The exception here is Pinterest, because I give you permission to pin my photos there IF YOU CITE THEM AS COMING FROM THIS BLOG AND THUS FROM ME.
I understand that Pinterest is useful for saving tutorials and photos for quilting inspiration, because I use it that way myself, and I'm okay with you doing that too - but PLEASE: "cite when you write". Give the creator some credit, will you? I have nothing against you trying to make something similar, or even selling it, but I'd like to get some credit for being your inspiration. Why? Well, because lots of crafts are passed down from person to person, and it feels nice to be able to say "yes, I taught you how to make that".
What I DON*T LIKE is you flat out stealing my photos and my written text.
If you want, check out my own shared Pinterest board: My creations
Or my Flickr photos: My photostream
For questions or further permissions, please email me at linnea.gronstrand [at]gmail[dot]com


Comments
Post a Comment