Craft Friday: Variations
Craft Friday is a 2012 recurring blog post
where I present either a hobby jewelry technique
or project I'm currently working on.
One thing I'm really glad for is the fact that since I decided that I wouldn't get stressed out or make any kind of excuses for a sudden lapse in my blogging. My text, my rules. Which is why I'm letting you know that last Friday's craft post has gotten slightly postponed. I wanted to write this post instead, and leave the post I had planned to write about "lack of inspiration" for a later Friday.
Yay, editor and writer's choice! Gotta love it.
*smiles*
So, instead I'm going to distract you all with some photos and talk about doing variations. More specifically, what I tried out a few days ago.
 |
| Upwards down on the paper: coated tiger wire (black), crimp bead covers in various diameters and some 'goldish' small plastic beads. |
I'll return to the crimp bead covers (shown in the photo) in a bit.
Now, I have written it here before, and I'm sure to comment on it again: I am not good at coming up with variations, and I'm really bad at randomization. Nevertheless, I wanted to see if I could force myself to up with any variations for the plastic "Christmassy" necklace I've already made some time ago.
Now, that necklace was a test, so some parts on it were a bit ... sloppily done. Mostly because I had to take it apart a few times. Which is why I wouldn't dare to give it away as a present. So, I made a new one, "version 1", which turned out much better.
Now, that necklace was a test, so some parts on it were a bit ... sloppily done. Mostly because I had to take it apart a few times. Which is why I wouldn't dare to give it away as a present. So, I made a new one, "version 1", which turned out much better.
In "version 1" (as in the "test" one I myself use) I used thicker red nylon beading string to string the red beads and the smaller 'goldish' beads in between. For "version 2" and "version 3" I used the black tiger wire (that you can see in the photo above).
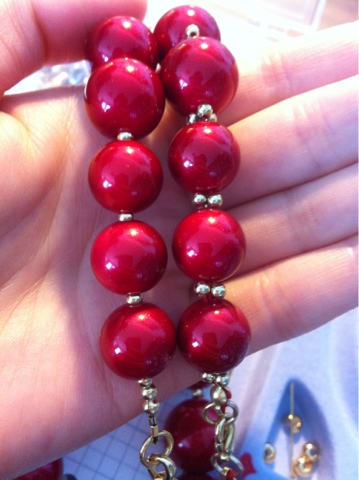 |
| Spacers. Version 2 (left) and version 1 (right). Notice the one vs. three bead "spacer" between the red beads themselves. |
So, the variation here is in the "space" between the red beads. Three vs. one 'goldish' beads. I still like the one with three better, though.
 |
| Tiger wire vs. nylon beading string. Version 2 (left) and version 1 (right). The tiger wire combo with the crimp beads in their respective crimp bead covers makes that version look a lot more tidy. Especially around the lock. |
But the variation with the tiger wire does present nicer ends at the lock. Oh well.
 |
| "Version 3" on the beading board. |
Now, "the thing" with tiger wire and crimp beads + covers is that you can make these things called floating or illusion necklaces. Which derives its name from the fact that (if done right) the beads seemingly just "float" on the wire, and if you use transparent wire it giving you the illusion of them just floating on your skin.
Well, onward to how it turned out.
 |
| "Version 3", the floating necklace. And, no, this is not product placement for the computer brand, it was just the only white thing I happened to have within reach to use as a background... But if you're still mumbling "smygreklam" then how about the Fiskars scissors in the upper right corner? :P |
Yes, it looks pretty okay to me.
The thing that was even more fun to notice was that the crimp bead covers make this "jingle jingle" sound around the crimp beads. So, it turned into a real "jingle beads necklace".
 |
| All the variations (from left to right): test, version 1, 2 and 3. |
And that was pretty much what I wanted to show you. From beading string to tiger wire, from one type of spacer to just "space" (on the floating necklace).


Comments
Post a Comment